
You have access to all the general information of your profile. By clicking on the , you can :
- Change your password: Fill in your old password, your new password and confirm your new password. Then click on Save.
- Choose the default language (English or French).
- Change the authentication information (Apikey).
On the left, you will find the menu to access the desired pages with :
Admin category :
Allow you to manage the project : from the users to the equipment. Several people in your company can have access to this hypervisor, so it is possible to assign roles to each user:
- Admin right : can create other users, manage their rights. He can also manage projects, sites and the equipment park..
- Manager right : can act on the data of an equipment and/or its parameters.
- Read right : can only read the data to which he has access.
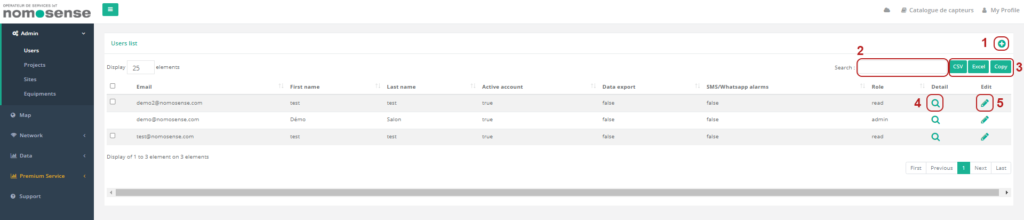
In the Users tab, you will find the list of users of the platform affiliated to your project.
As an Admin, you can:
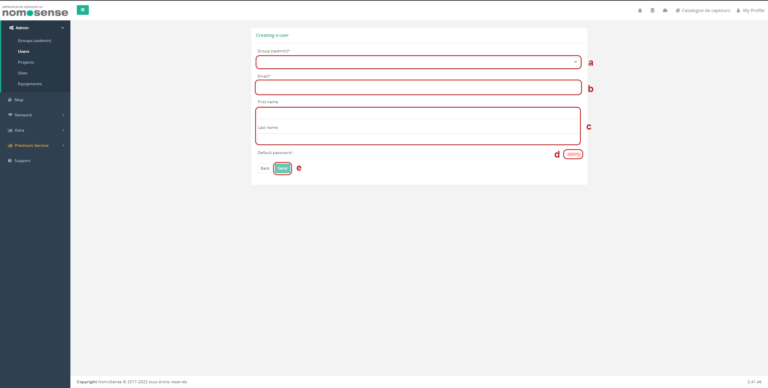
- Add a new user by clicking on
 A window opens:
a. Choose the Group to which the user will be associated,
b. Fill in the email address,
c. Fill in the user’s first and last name (optional),
d. The default password is indicated, the user will change it by going to My Profile (detailed previously),
e. Click on Send.
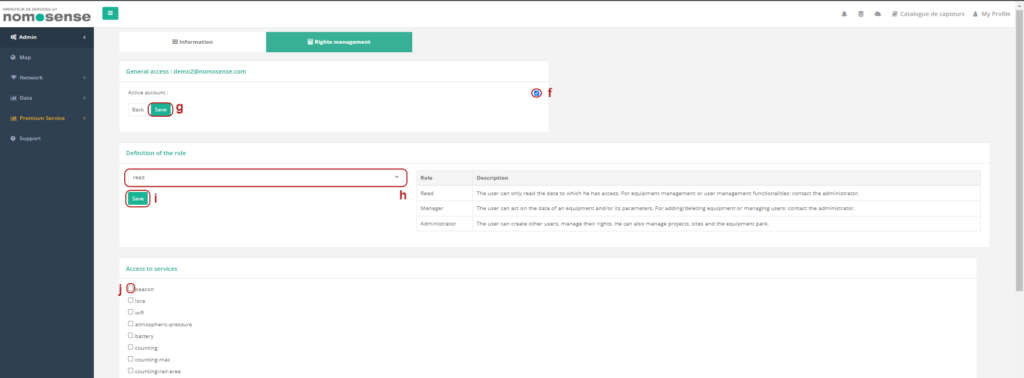
Once the creation is successful, you arrive on the page of ![]() where you can :
where you can :
- Choose if the account is active or not by checking the box
An active account means …
- Click on Save
- Define the role according to the 3 roles described
- Click on Save
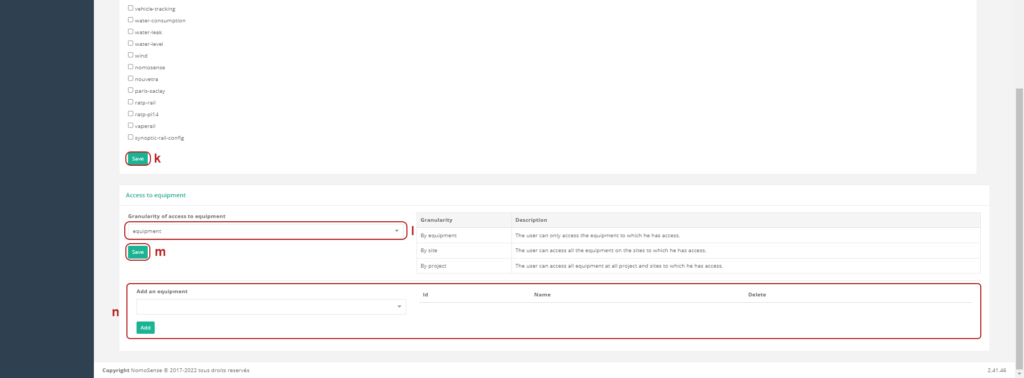
- Choose the services to which the user will have access
- Click on Save
- Define the granularity of the access to the equipment according to the details indicated in the table
- Click on Save
- Add a new device:
On this page, you also have access to the tab ![]()
related to the information of the user, you can :
- Update the general information
- Add a number of token
- Add an API key
The information is automatically saved.
- Search a user by Name (email address)
- Export user data: Copy, CSV or Excel
- Open user details for general information or rights management
- Edit user details: general information, login information, rights management
Note: To delete a user, go to the user details and click on the ![]() . The confirmation of deletion appears, click Yes.
. The confirmation of deletion appears, click Yes.
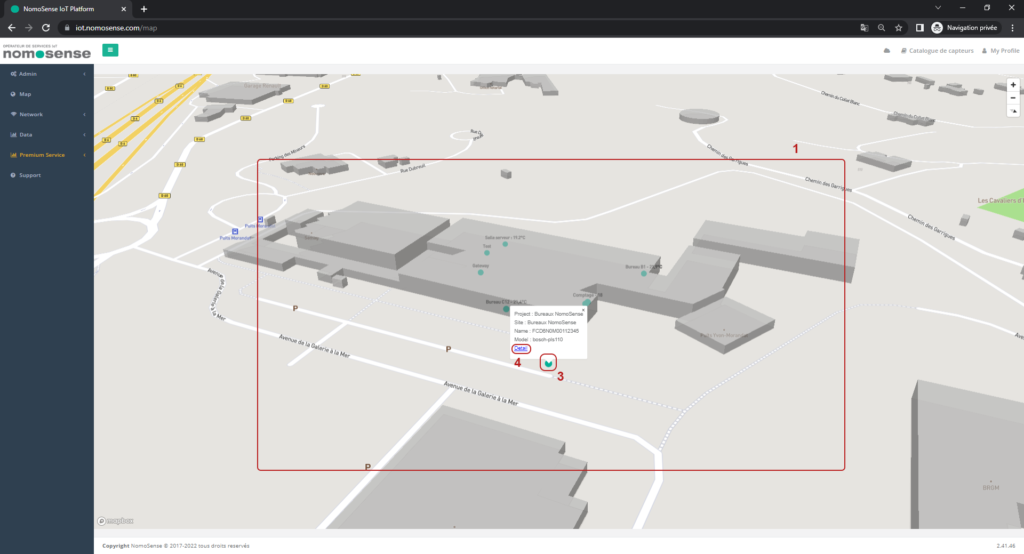
Category cartography
You can directly access your sensor park by clicking on the green button ![]() or zoom in on a part of the map with the + and – at the top right or by using the scroll wheel of your mouse.
or zoom in on a part of the map with the + and – at the top right or by using the scroll wheel of your mouse.